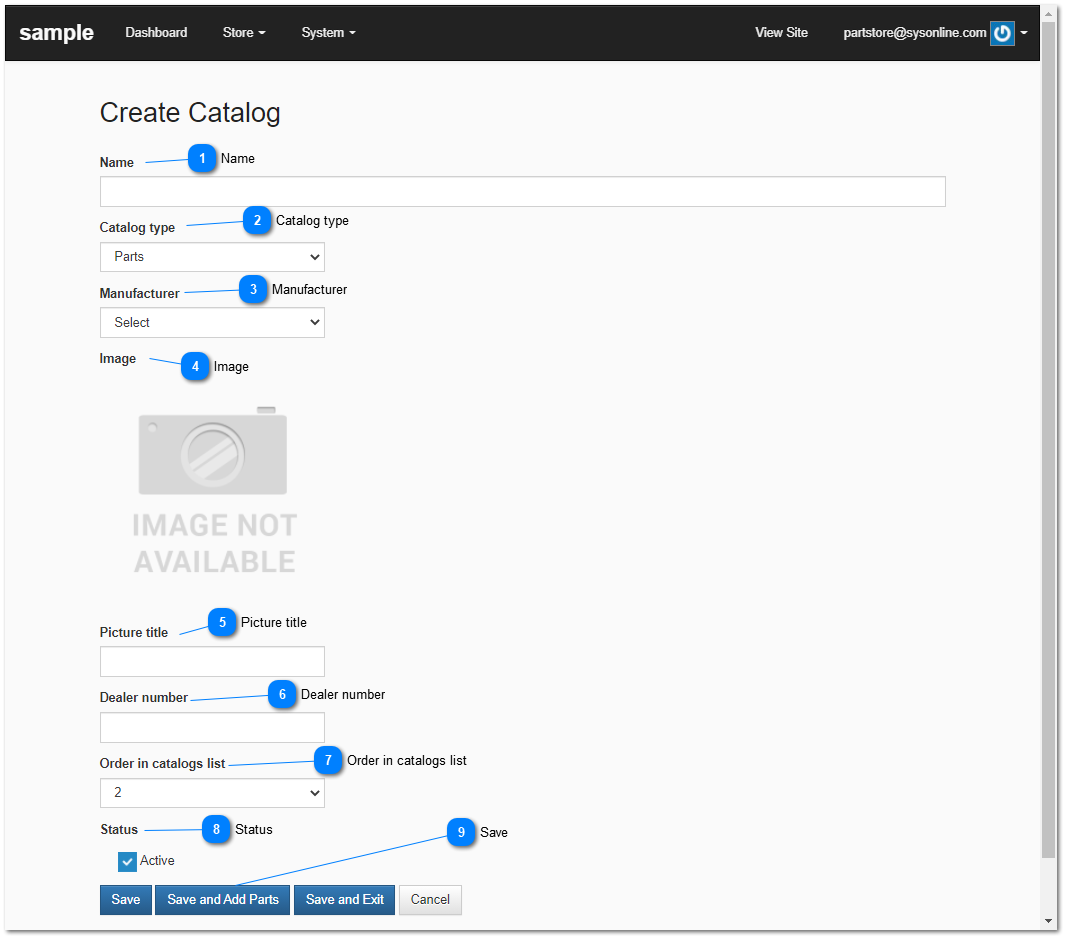
3.1.1.1. Create New Catalog
Create New Catalog
 Name
You must provide a name for each catalog. The catalog name will be visible to end consumers.
|
|
 Catalog type
You must select a catalog type. Depending on your store configuration you may have the following options available:
-
Parts - parts represent physical products that can be sold. This includes manufacturers parts and non-OEM products, tools, and accessories.
-
Virtual Products - are products that are sold to an end consumer and delivered via a link or download. These products are not sent from any warehouse or physical facility.
|
|
 Manufacturer
In the case where your catalog contains a list of manufacturer's parts, select the manufacturer who's parts you have listed in the catalog. If you work with multiple manufacturers you will need to create separate catalogs for each manufacturers parts. It is important that you select the correct manufacturer as OEM catalogs need to be approved by the manufacturer before your store can appear as a buying option in the manufacturer's electronic parts catalog.
If your catalog does not contain OEM parts the select catalog type none.
|
|
 Image
If no image is selected then the manufacturer's default catalog image will be displayed. To change the image, click on the default image that is displayed for the manufacturer or click on the "image not available" placeholder image displayed on your screen.
|
|
 Picture title
You have the option of specifying an image title that may visible to end consumers depending on their browser settings.
|
|
 Dealer number
In the case of a Manufacturer approved catalog specify your dealer number. This information will be verified by the manufacturer.
|
|
 Order in catalogs list
Specify the sort order in your catalog list. This is used to order your catalogs on your main store page, or when the user clicks on the catalog link in the menu.
|
|
 StatusSelect Active to make the catalog contents available in your online store and available for purchase by end consumers.
|
|
 Save
After filling in all fields click Save, Save and Add Parts or Save and Exit. Save and Add Parts allows you to easily upload parts to your new catalog.
|
|
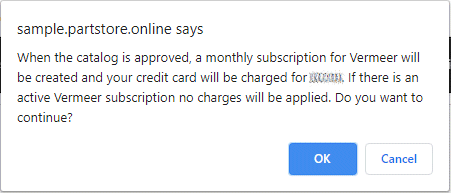
After saving you will see a warning message. The message informs you that there may be charges associated with creating a manufacturer parts catalog.